> ## Documentation Index
> Fetch the complete documentation index at: https://walletconnect-pay-docs-rtomas-add-merchant-networks-guide.mintlify.site/llms.txt
> Use this file to discover all available pages before exploring further.
# Add a network to a merchant
> Configure the networks, settlement addresses, and tokens a merchant accepts from the WalletConnect Pay dashboard.
Each network on a merchant defines where WalletConnect Pay settles funds and which tokens buyers can pay with. This guide adds a network to an existing merchant from the dashboard in a few steps.
Don't have access to the dashboard yet? [Contact sales](https://share.hsforms.com/19Dpp4ayYR9uriB3xNAh0JAnxw6s) to get started.
Go to the [WalletConnect Pay dashboard](https://merchant.pay.walletconnect.com/) and sign in if prompted.
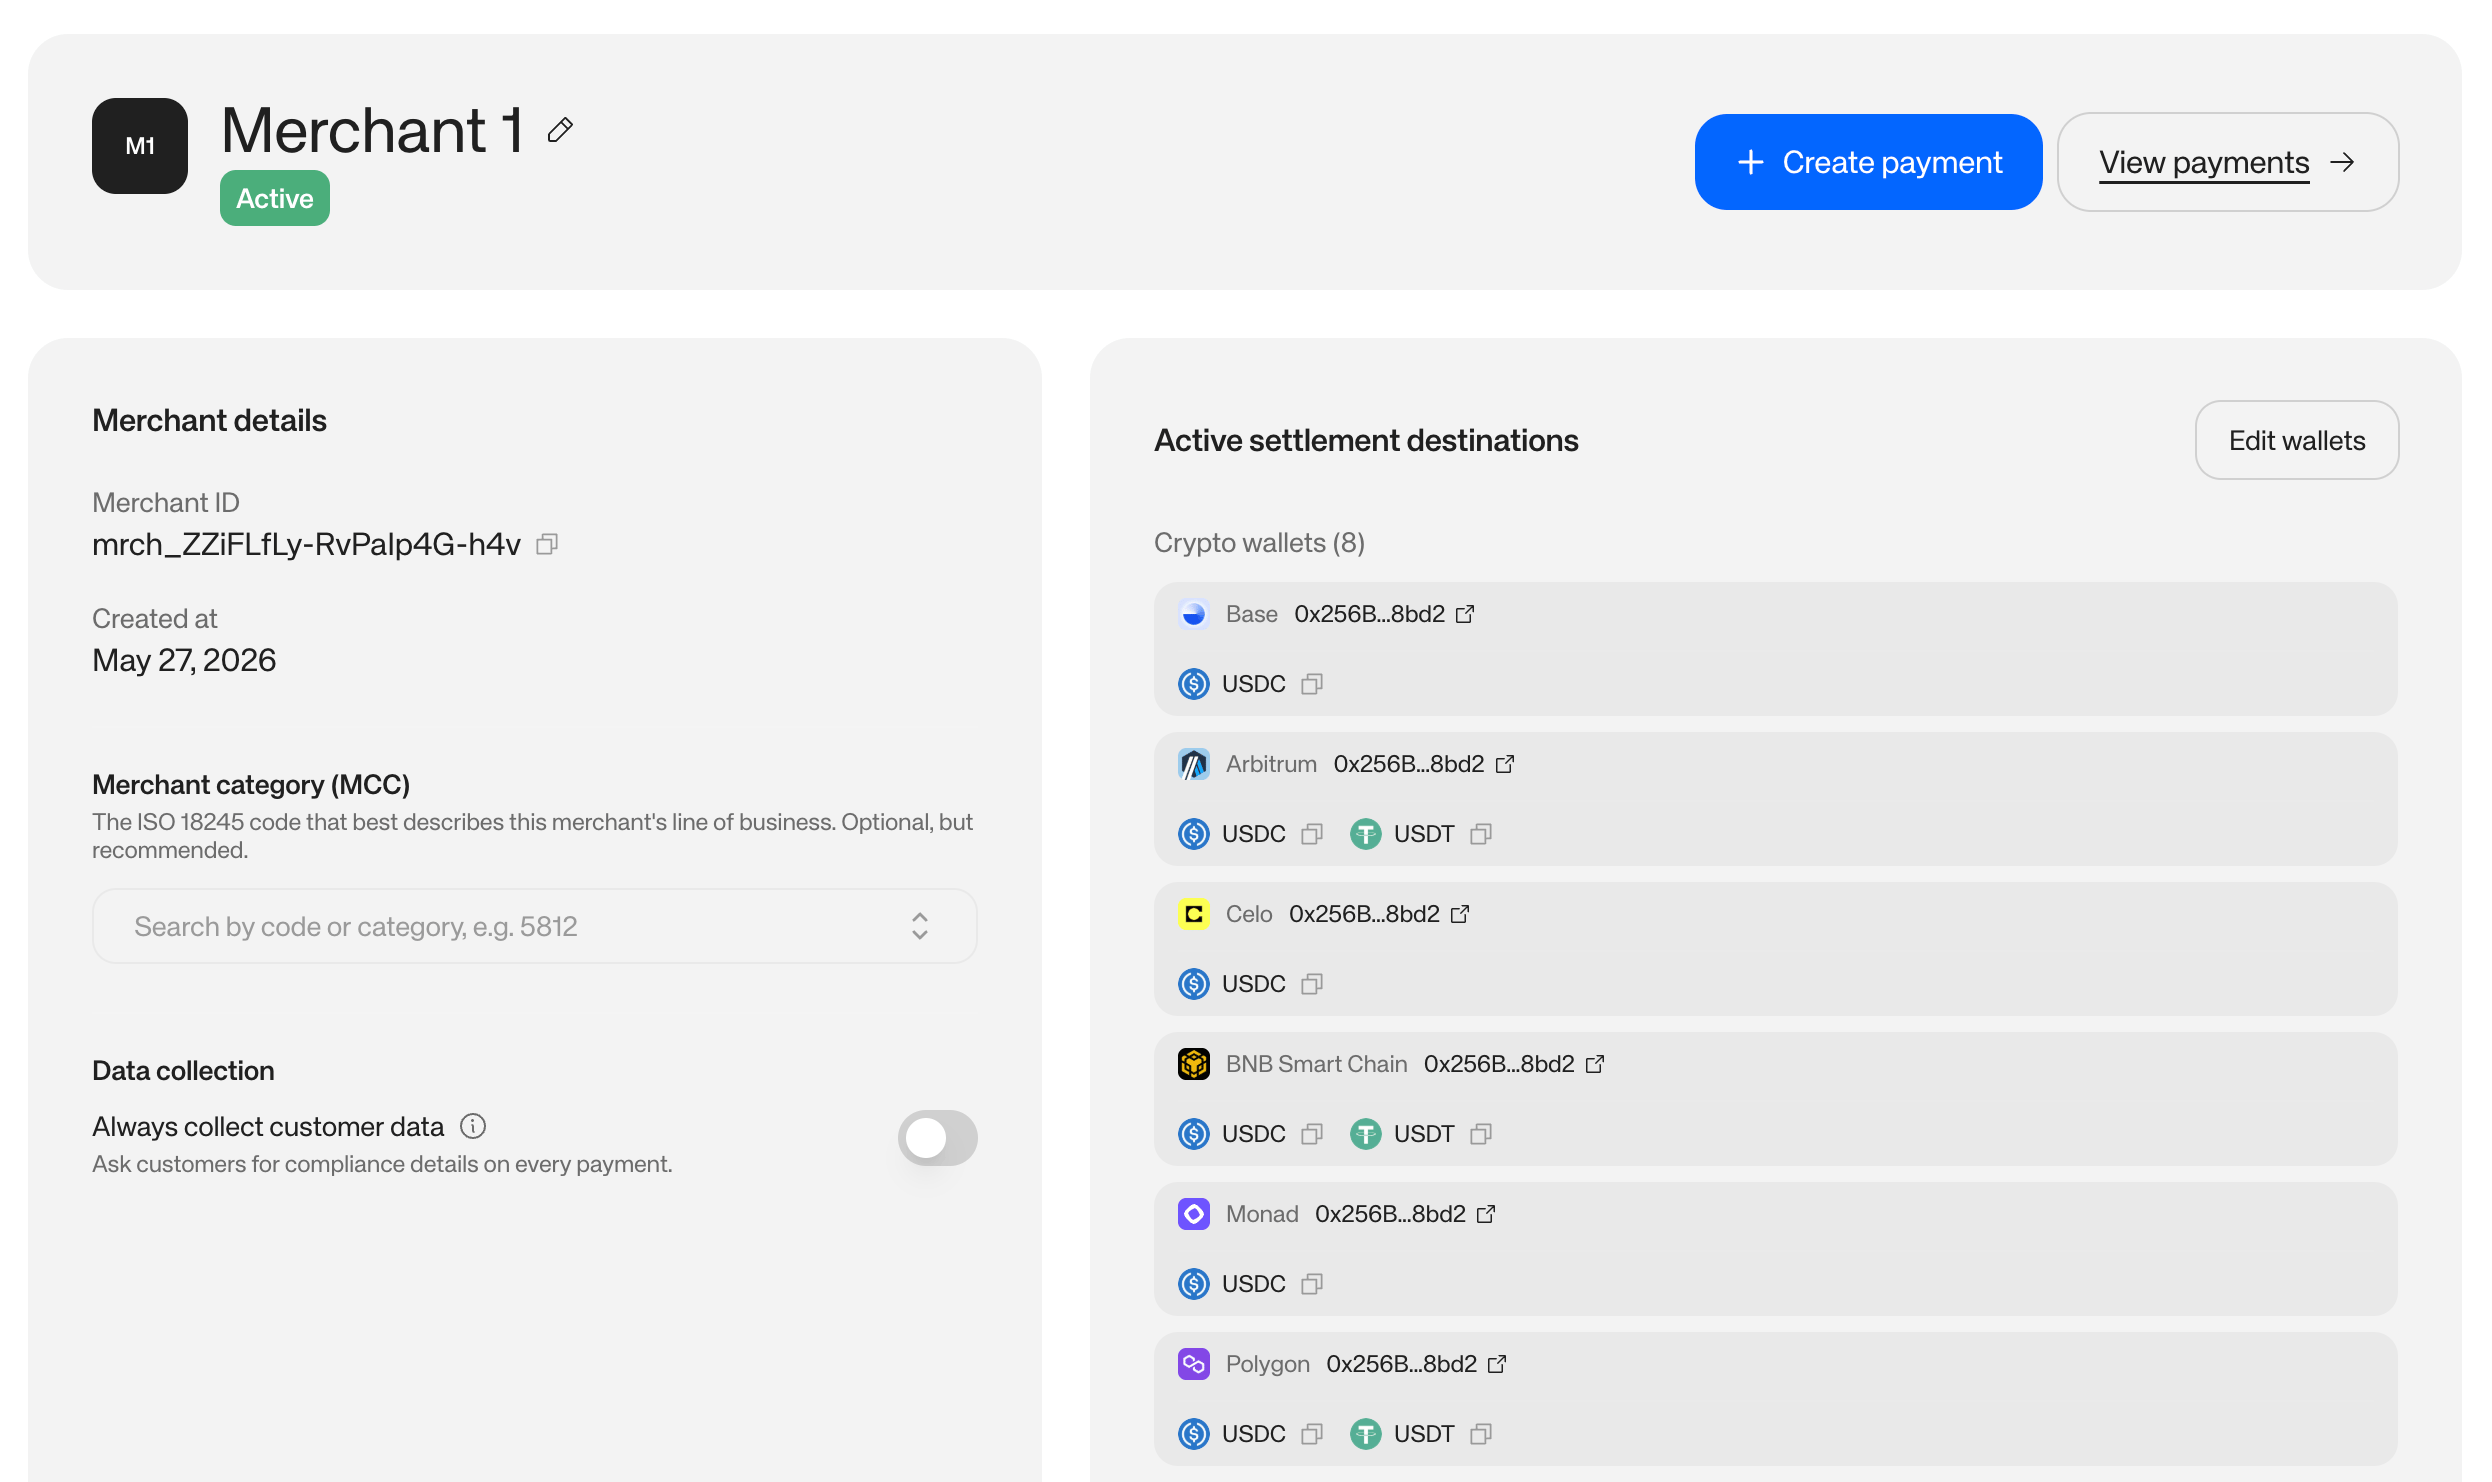
Choose the merchant you want to configure from the list. The merchant page shows its details and **Active settlement destinations** — every network, address, and token it currently accepts.
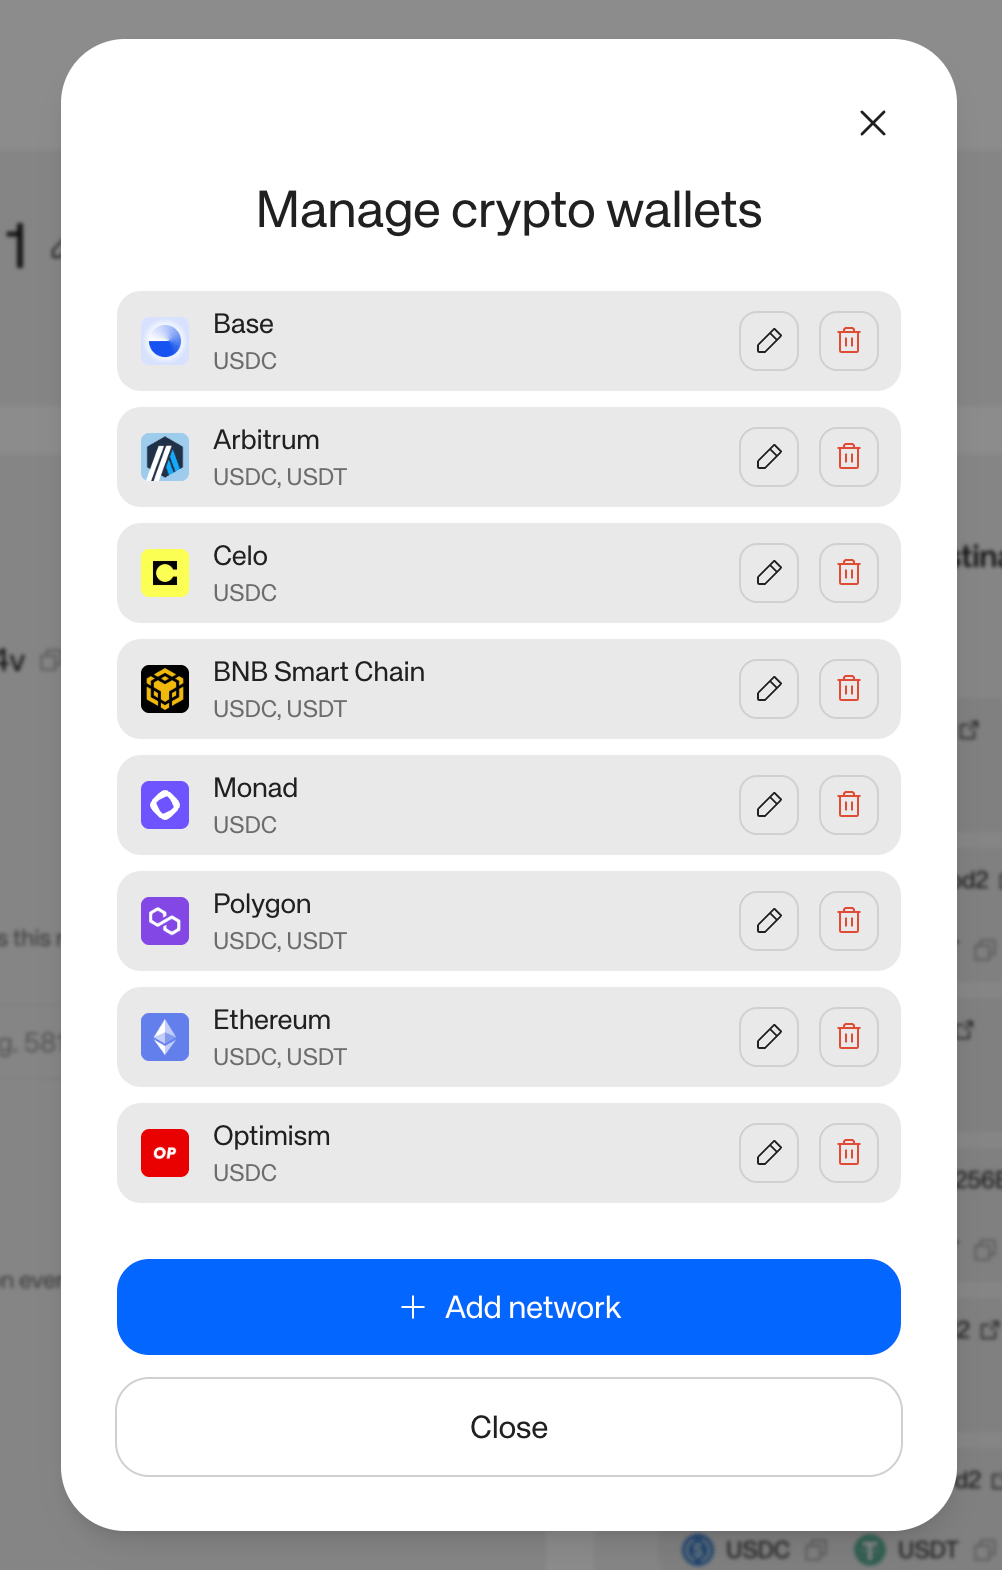
Click **Edit wallets** to open the **Manage crypto wallets** dialog.
 Click **Add network** to open the **Add network** dialog.
 Open the **Network** dropdown and pick the network you want to add — for example, Ethereum, OP Mainnet, or Solana.
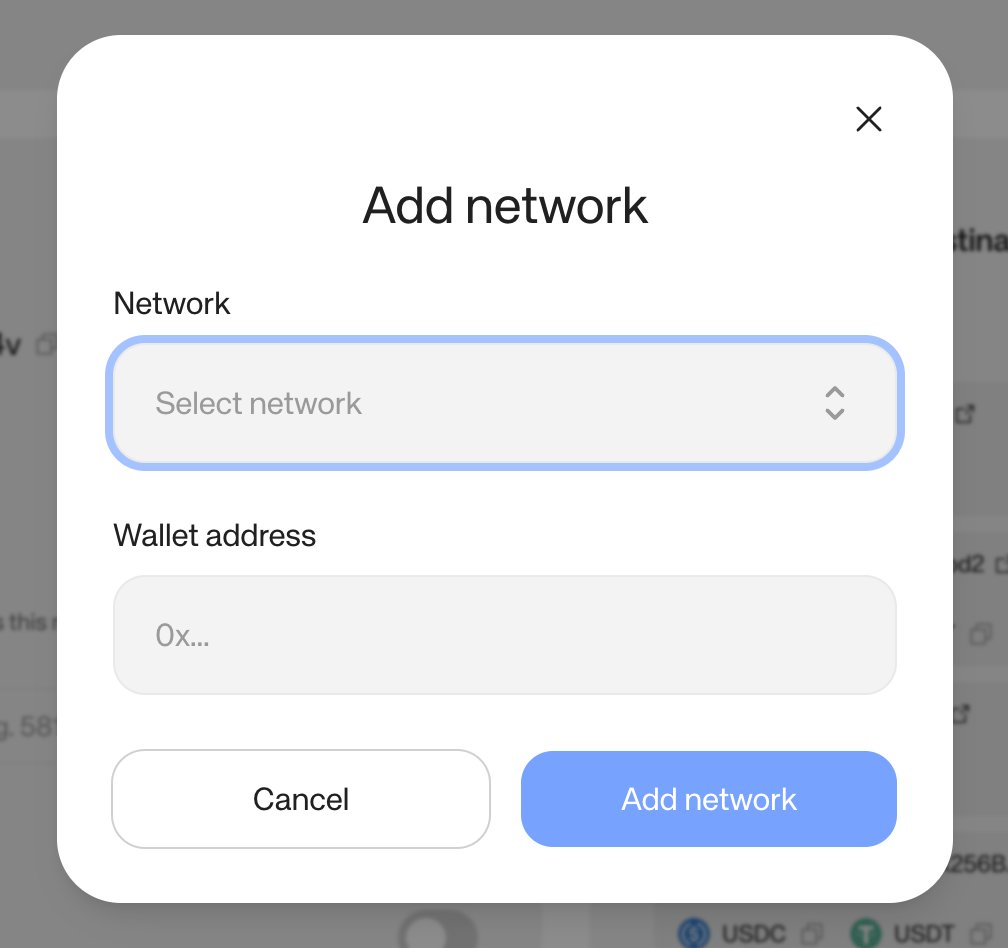 In the **Wallet address** field, paste the address that will receive settled funds on the selected network.
Double-check the address before saving. Settlements are on-chain and cannot be reversed. Use an address on the same network you selected in the previous step.
Under **Tokens**, select each token the merchant should accept on this network — for example, ETH and USDC. A checkmark marks the selected tokens.
In the **Wallet address** field, paste the address that will receive settled funds on the selected network.
Double-check the address before saving. Settlements are on-chain and cannot be reversed. Use an address on the same network you selected in the previous step.
Under **Tokens**, select each token the merchant should accept on this network — for example, ETH and USDC. A checkmark marks the selected tokens.
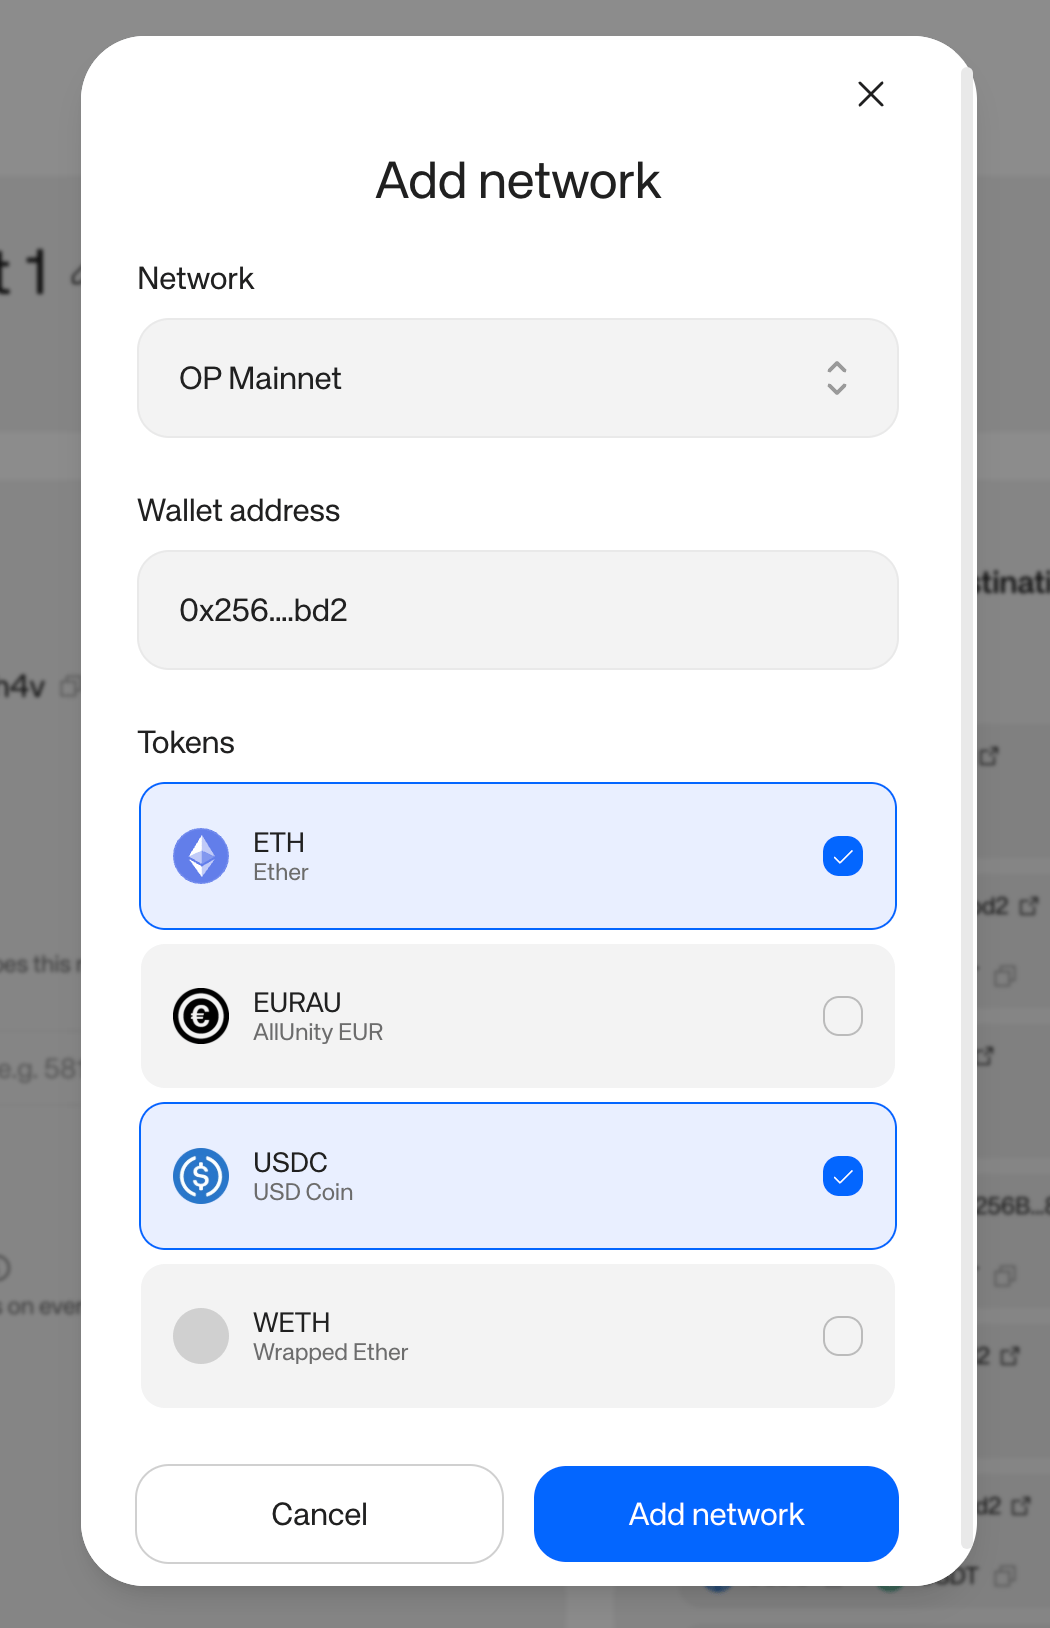 Only tokens supported on the selected network appear in the list. See [Token & Chain Coverage](/payments/token-and-chain-coverage) for the full list.
Click **Add network**. The new network appears in **Active settlement destinations** and buyers can immediately pay with the tokens you selected.
## Next steps
* Repeat these steps to add more networks to the same merchant.
* Configuring settlement programmatically instead? See the [Merchant API quickstart](/payments/merchant/quickstart).
Only tokens supported on the selected network appear in the list. See [Token & Chain Coverage](/payments/token-and-chain-coverage) for the full list.
Click **Add network**. The new network appears in **Active settlement destinations** and buyers can immediately pay with the tokens you selected.
## Next steps
* Repeat these steps to add more networks to the same merchant.
* Configuring settlement programmatically instead? See the [Merchant API quickstart](/payments/merchant/quickstart).